이전 글을 읽고 Nest.js 설정을 하는 게 좋음.
[Nest.js] 1. Nest.js 프로젝트 구조 파악하기
노마드 코더님의 nest.js 기초 강의를 토대로 필기한 것입니다.nest.js란node.js의 웹 프레임워크로, express위에서 작동하는 프레임워크이다. express와 fastify 두 가지가 전부 호환되므로 매우 실용적인
sksmsfbrjs51.tistory.com
Nest.js로 영화 REST API를 만들어보자
Movies controller
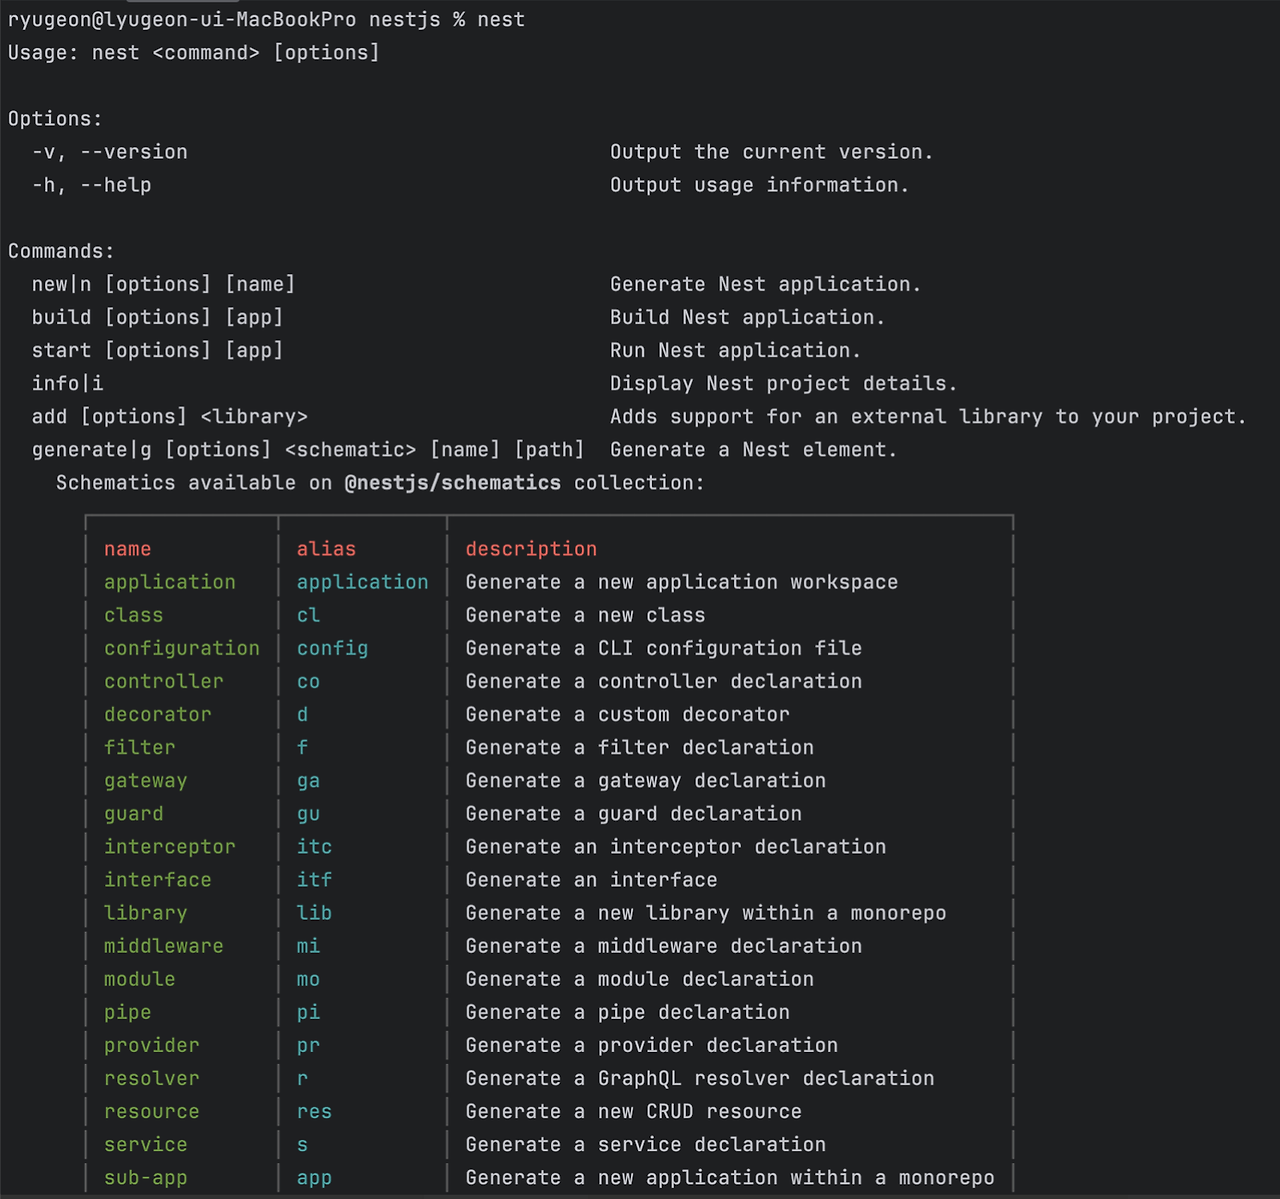
우리는 @nestjs/cli 를 설치했기 때문에 커맨드 라인으로 모든 것을 생성할 수 있다.

여기서 새로운 컨트롤러를 생성해보자
nest generate(g) co
이후 사용하고자 하는 controller 이름을 생성하면 다음과 같이 폴더가 생성된다.
여기서 spec은 test file인데 없어도 정상적으로 작동한다. 일단 삭제하고 하자!
- movie.controller.ts
import { Controller, Delete, Get, Param, Patch, Post, Put } from "@nestjs/common";

// '/movies' 엔드포인트 컨트롤러
@Controller('movies')
export class MoviesController {
  // none endpoint
  @Get()
  getAll(): string {
    return 'This will return all movies';
  }

  // PathVariable 사용
  @Get(':id')
  getOne(@Param('id') movieId: string) {
    return `This will return one movie with the id : ${movieId}`;
  }

  @Post()
  create() {
    return 'This will create a movie';
  }

  @Delete(':id')
  remove(@Param('id') movieId: string) {
    return `This will delete a movie with the id : ${movieId}`;
  }

  // 모든 리소스 업데이트
  // @Put("/:id")
  // put() {
  //   return 'This will update a movie';
  // }

  // 일부 리소스 업데이트
  @Patch(':id')
  path(@Param('id') movieId: string) {
    return `This will update a movie with the id : ${movieId}`;
  }
}
Path Variable을 사용하고 싶으면 함수 안에 @Param(’var’) var: vartype 을 사용한다.
More decorator
- Post의 RequestBody
@Post()
create(@Body() movieData) {
  return movieData;
}
Body 데코레이터를 통해 json 매핑 가능하다.
- Query Parameter 사용
// query parameter 사용
@Get('search')
search(@Query('year') searchingYear: string) {
  return `We are searching for a movie made after : ${searchingYear}`;
}

// PathVariable 사용
@Get(':id')
getOne(@Param('id') movieId: string) {
  return `This will return one movie with the id : ${movieId}`;
}
첫 번째 get에서 (/:id) 보다 search가 밑에 있으면 search를 id로 인식해버림 (nest의 단점)
- patch
// 일부 리소스 업데이트
@Patch(':id')
path(@Param('id') movieId: string, @Body() updateData) {
  return {
    updatedMovie: movieId,
    ...updateData, // json을 그대로 리턴
  };
}
- Delete
@Delete(':id')
remove(@Param('id') movieId: string) {
  return `This will delete a movie with the id : ${movieId}`;
}
Movies Service
로직을 관리하는 역할을 하는 서비스를 생성해보자
- 터미널에서 다음 프롬프트 입력
nest g s(service)
service.ts를 생성했으면 실제 서비스에서 조작할 entity가 필요하다.
해당 movies 폴더 안에 entity를 생성해보자.
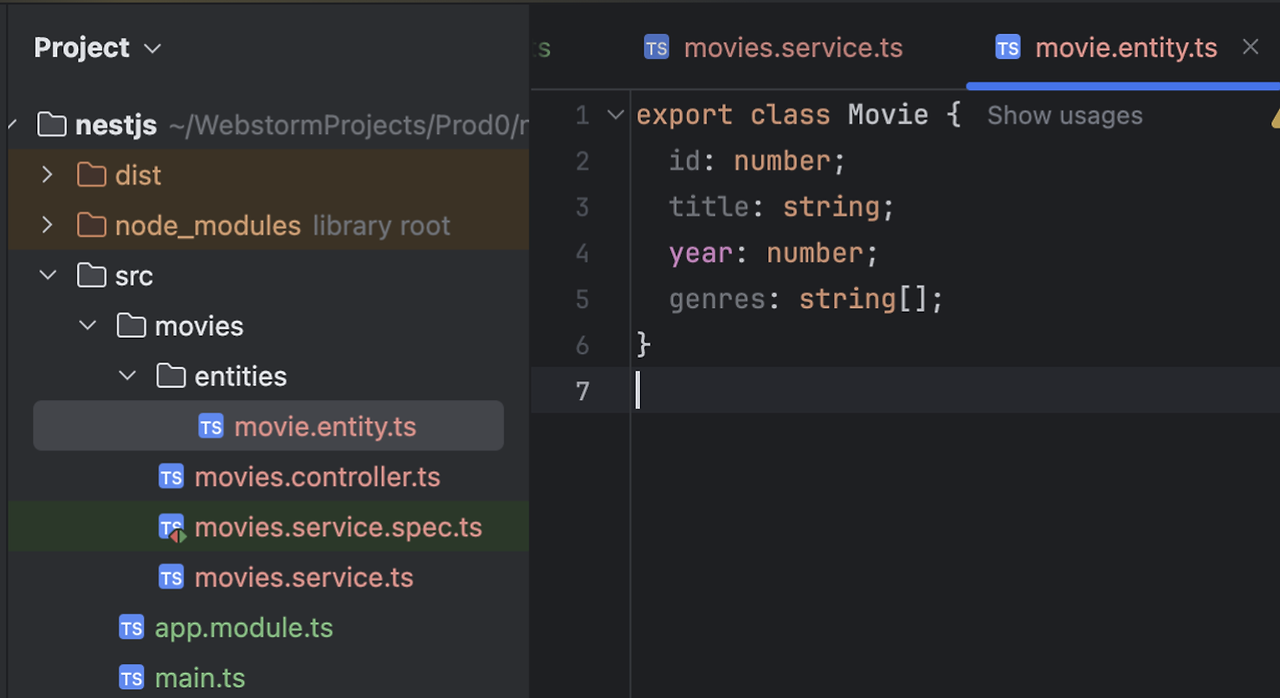
이름은 코드 컨벤션에 맞게 생성해주어야 한다!
- movie.entity.ts
export class Movie {
  id: number;
  title: string;
  year: number;
  genres: string[];
}
엔티티를 생성했다면, DB 역할을 할 수 있는 더미 db(array)를 만들어 service에서 로직을 구현한다.
- movies.service.ts
import { Injectable } from '@nestjs/common';
import { Movie } from './entities/movie.entity';

@Injectable()
export class MoviesService {
  private movies: Movie[] = [];

  getAll(): Movie[] {
    return this.movies;
  }

  getOne(id: string): Movie {
    return this.movies.find((movie) => movie.id === +id);
  }

  deleteOne(id: string): boolean {
    this.movies.filter((movie) => movie.id !== +id);
    return true;
  }

  create(movieData: Movie) {
    this.movies.push({
      id: this.movies.length + 1,
      ...movieData,
    });
  }
}
이를 controller에 적용하고 싶을 때, 다음과 같이 controller에서 constructor에 service를 DI 해준다.
여기서 DI란, 의존성 주입의 의미로서 하나의 객체에 다른 객체의 의존성을 제공하는 기술이다.
- controller.ts
@Controller('movies')
export class MoviesController {
	// 의존성 주입
  **constructor(private readonly movieService: MoviesService) {}**

  // none endpoint
  @Get()
  getAll(): Movie[] {
    return this.movieService.getAll();
  }

  // PathVariable 사용
  @Get(':id')
  getOne(@Param('id') movieId: string): Movie {
    return this.movieService.getOne(movieId);
  }

  @Post()
  create(@Body() movieData) {
    return this.movieService.create(movieData);
  }

  @Delete(':id')
  remove(@Param('id') movieId: string) {
    return this.movieService.deleteOne(movieId);
  }
}
만약 query parameter에 이상한 값이 들어오는 경우와 같이, 에러를 처리해야 할 수도 있다.
다음과 같이 service 로직을 수정해보자
- movies.service.ts
getOne(id: string): Movie {
  const movie = this.movies.find((movie) => movie.id === +id);
  if (!movie) {
    **throw new NotFoundException(`Movie with ID ${id} Not Found`);**
  }
  return movie;
}
해당 movie가 존재하지 않을 때, 에러를 발생시키므로써 처리할 수 있게 되었다.
- 전체 코드
- service
import { Injectable, NotFoundException } from "@nestjs/common"; import { Movie } from './entities/movie.entity'; @Injectable() export class MoviesService { private movies: Movie[] = []; getAll(): Movie[] { return this.movies; } getOne(id: string): Movie { const movie = this.movies.find((movie) => movie.id === +id); if (!movie) { throw new NotFoundException(`Movie with ID ${id} Not Found`); } return movie; } deleteOne(id: string) { this.getOne(id); // 먼저 id에 대한 영화 존재 유무 확인 this.movies = this.movies.filter((movie) => movie.id !== +id); } create(movieData: Movie) { this.movies.push({ id: this.movies.length + 1, ...movieData, }); } update(id: string, updateData) { const movie = this.getOne(id); this.deleteOne(id); this.movies.push({ ...movie, ...updateData }); } }- controller
import { Body, Controller, Delete, Get, Param, Patch, Post, Put, Query } from "@nestjs/common";
import { MoviesService } from './movies.service';
import { Movie } from './entities/movie.entity';

// '/movies' 엔드포인트 컨트롤러
@Controller('movies')
export class MoviesController {
  constructor(private readonly movieService: MoviesService) {}

  // none endpoint
  @Get()
  getAll(): Movie[] {
    return this.movieService.getAll();
  }

  // PathVariable 사용
  @Get(':id')
  getOne(@Param('id') movieId: string): Movie {
    return this.movieService.getOne(movieId);
  }

  @Post()
  create(@Body() movieData) {
    return this.movieService.create(movieData);
  }

  @Delete(':id')
  remove(@Param('id') movieId: string) {
    return this.movieService.deleteOne(movieId);
  }

  // 일부 리소스 업데이트
  @Patch('/:id')
  path(@Param('id') movieId: string, @Body() updateData) {
    return this.movieService.update(movieId, updateData);
  }
}
DTOs and Validation
만약 POST나 PATCH 요청에서 Body에 이상한 json을 넘겨준다고 했을 때, 이에 대한 유효성 검사를 진행해야 한다.
따라서 json을 그대로 사용하지 말고 DTO를 사용하여 데이터를 주고 받고 유효성 검사를 진행해보자.

해당 DTO를 사용하기 위해 service와 controller 단에서 request body의 타입을 DTO로 설정해준다. (스프링과 유사!)
- controller
@Post()
create(@Body() movieData: **CreateMovieDto**) {
  return this.movieService.create(movieData);
}
- service
create(movieData: CreateMovieDto) {
  this.movies.push({
    id: this.movies.length + 1,
    ...movieData,
  });
}
유효성 검사에 대해 적용하기 위해 main.ts에 pipe를 하나 만들어줘야 한다.
(express.js의 middleware와 같음)
- main.ts
import { NestFactory } from '@nestjs/core';
import { AppModule } from './app.module';
import { ValidationPipe } from '@nestjs/common';

async function bootstrap() {
  const app = await NestFactory.create(AppModule);
  app.useGlobalPipes(new ValidationPipe({
		  whitelist: true,
		  forbidNonWhitelisted: true,
	  }),
  );
  await app.listen(3000);
}
bootstrap();
ValidationPipe에는 여러 옵션이 들어갈 수 있다.
- whitelist : true일 경우, 아무 decorator도 없는 object는 유효성 검사를 진행하지 않음
- ex> dto에 들어있는 속성이 아닌 값은 쳐다도 안보는 것.
- forbidNonWhitelisted: true일 경우, 유효성 검사를 통과하지 못할 경우 request 자체를 막아버릴 수 있음
- transform: true일 경우, 사용자가 원하는 실제 타입으로 변경해줌.
- controller
// PathVariable 사용 (url에 들어있는 값이기 때문에 타입이 string 이다.) @Get(':id') getOne(@Param('id') movieId: **number**): Movie { return this.movieService.getOne(movieId); }- service
deleteOne(id: number) { this.getOne(id); // 먼저 id에 대한 영화 존재 유무 확인 this.movies = this.movies.filter((movie) => movie.id !== id); } - ex> path variable 같은 경우 url에 들어있는 값이므로 기본적으로 string type이다. 하지만 dto에서는 이를 number로 받을 경우 service 단에서 타입 캐스팅을 진행해줘야 한다. 하지만 transform 옵션이 이를 해결해준다.
또한 class의 유효성을 검사하기 위해 다음과 같은 모듈을 설치해준다
npm i class-validator class-transformer
그럼 다음과 같이 class-validator 모듈의 데코레이터를 사용할 수 있다.
- create-movie.dto.ts
import { IsNumber, IsString } from "class-validator";

export class CreateMovieDto {
  @IsString() // string 인지 검사
  readonly title: string;
  @IsNumber() // number 인지 검사
  readonly year: number;
  @IsString({ each: true }) // 모든 요소가 string 인지 검사
  readonly genres: string[];
}
- update-movie.dto.ts
import { IsNumber, IsString } from "class-validator";

export class UpdateMovieDto {
  @IsString() // string인지 검사
  readonly title?: string;
  @IsNumber() // number인지 검사
  readonly year?: number;
  @IsString({ each: true }) // 모든 요소 검사
  readonly genres?: string[];
}
타입에 ?: 를 작성하여 선택적 속성을 나타낼 수 있다.
- 선택적 속성 : 값이 제공되지 않을 수 있으며, 이 경우 해당 속성은 undefined가 된다.
하지만 이렇게 사용하지 말고 편리하게 NestJS에서 제공하는 PartialType 패키지를 사용해보자
npm i @nestjs/mapped-types
- mapped-types : 타입을 변환시키고 사용할 수 있게 하는 패키지
그럼 PartialType 패키지를 사용하여 수정해보자.
- update-movie.dto.ts
import { PartialType } from '@nestjs/mapped-types';
import { CreateMovieDto } from './create-movie.dto';

export class UpdateMovieDto extends PartialType(CreateMovieDto) {}
PartialType(baseType) 은 NestJS의 유틸리티 함수로, 주어진 클래스의 모든 속성을 선택적으로 만드는 타입을 생성한다.
하지만 genres의 모든 요소에 대해 선택적 속성이 적용되지 않으므로 @IsOptional 을 사용하여 create-movie.dto도 수정해보자
import { IsNumber, IsOptional, IsString } from "class-validator";

export class CreateMovieDto {
  @IsString() // string인지 검사
  readonly title: string;
  @IsNumber() // number인지 검사
  readonly year: number;
  @IsOptional() // 선택적 속성
  @IsString({ each: true }) // 모든 요소 검사
  readonly genres: string[];
}
Modules and Dependency Injection
App.module.ts는 오직 AppController, AppService만 가지고 있어야 한다.
Movies 모듈은 독자적인 Movie.module을 가지고 있어야 하는 것.
따라서 movies만의 module을 생성해보자.
이름은 movies로 하자
$ nest g mo(module)
그럼 다음과 같이 App.module에 다음과 같이 적용이 된다.
- app.modules.ts
import { Module } from '@nestjs/common';
import { MoviesModule } from './movies/movies.module';

// 데코 레이터
@Module({
  imports: [MoviesModule],
  controllers: [],
  providers: [],
})
export class AppModule {}
- movies.modules.ts
import { Module } from '@nestjs/common';
import { MoviesController } from './movies.controller';
import { MoviesService } from './movies.service';

@Module({
  controllers: [MoviesController],
  providers: [MoviesService],
})
export class MoviesModule {}
자, movies만의 service와 controller를 분리해보았다.
그럼 언제 app.module을 쓰고 controller와 provider를 만들면 될까?
app의 시작 시 작동하는 controller와 service를 담당하는 역할이라고 생각하면 좋을 듯 하다.
- app.controller
import { Controller, Get } from "@nestjs/common";

@Controller('')
export class AppController {
  @Get()
  home() {
    return 'Welcome to my Movie API';
  }
}
DI란?
Dependency Injection 즉, 의존성 주입이라는 뜻으로 사용자가 직접 implement하는 것이 아니라 NestJS가 의존성을 주입해주는 것.
ex> movies.controller.ts
@Controller('movies')
export class MoviesController {
  constructor(private readonly movieService: MoviesService) {}

  // none endpoint
  @Get()
  getAll(): Movie[] {
    return this.movieService.getAll();
  }
}
사용자는 MoviesService라는 타입을 지정해주었을 뿐, 실제로 MoviesService를 import하고 Controller에 inject하는 것은 NestJS가 하는 것이다.
이를 IoC (의존성 역전 법칙) 이라고 한다.
이는 Service의 @Injectable() 데코레이터를 보면 알 수 있다.
- service
@Injectable()
export class MoviesService {
  private movies: Movie[] = [];

  getAll(): Movie[] {
    return this.movies;
}'Back-end > Nest.js' 카테고리의 다른 글
| [Nest.js] 3. Testing (0) | 2024.07.02 |
|---|---|
| [Nest.js] 1. Nest.js 프로젝트 구조 파악하기 (0) | 2024.07.02 |