
회의 요약 서비스 플랫폼 프로젝트를 기획 중 Google Meet를 서비스 내에서 구현할 수 있어야 하는 문제가 생겼다...
실제로 써본 적이 없는 API이기 때문에, 사용법 숙지를 위해 테스트 프로젝트를 생성했다.
Google Meet은 자체적인 API가 없어서 Google Calendar 이벤트를 생성할 때 Meet 회의를 추가하는 방식으로 URL을 발급받을 수 있다고 한다.
흐름
1. Google OAuth2 인증을 통해 구글 계정에 대한 인가 코드를 받는다.
2. 해당 인가 코드를 통해 사용자의 Google Calendar 의 Hangout 타입의 이벤트를 생성한다 (Google Meet) .
3. 해당 Google Meet의 URL을 발급한다.
1. Google Cloud Platform 설정
먼저 Google Cloud Platform에서 프로젝트를 설정하고 Google Calendar API를 활성화해야 한다.
- Google Cloud Console에 로그인하여 새로운 프로젝트를 생성해준다.
- API 및 서비스 -> 라이브러리로 이동하여 Google Calendar API를 검색한 후 활성화해준다.

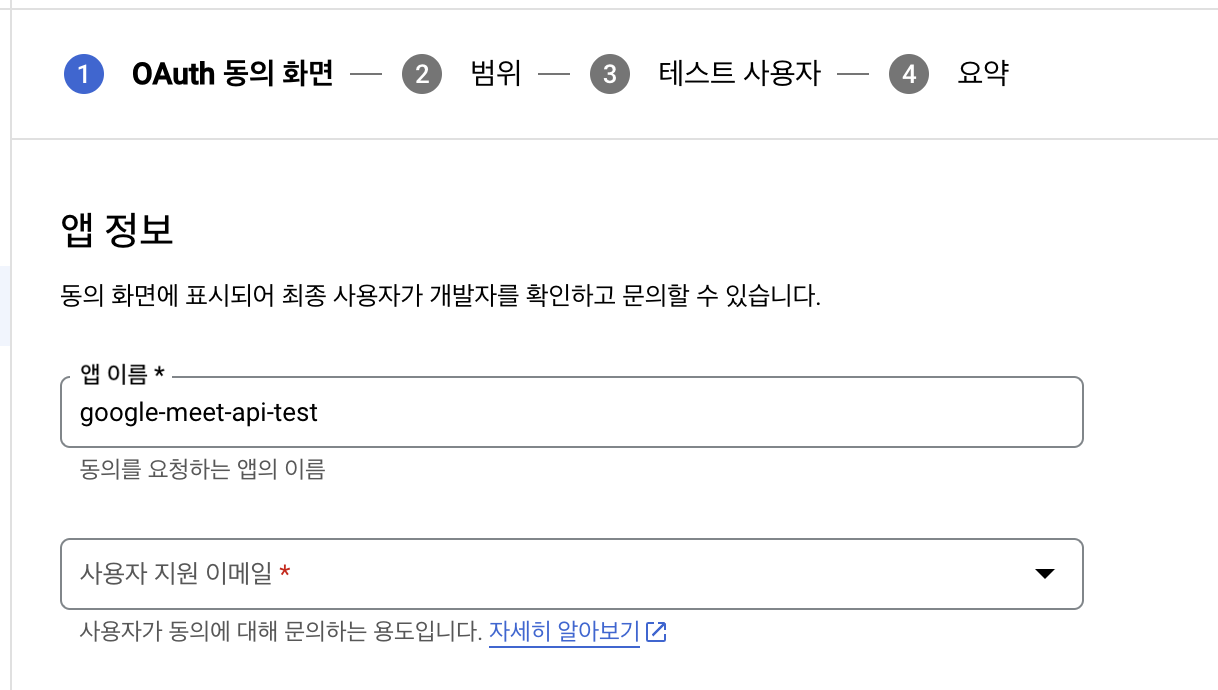
- API 및 서비스 -> 사용자 인증 정보로 이동하여 OAuth 2.0 클라이언트 ID를 생성하기 전에 먼저 동의 화면을 구성해준다.
- User Type은 외부로 설정해주고 생성한다.
- oauth 동의 화면에서 앱 이름과 사용자 지원 이메일을 설정해두고 다음으로 넘어간다.
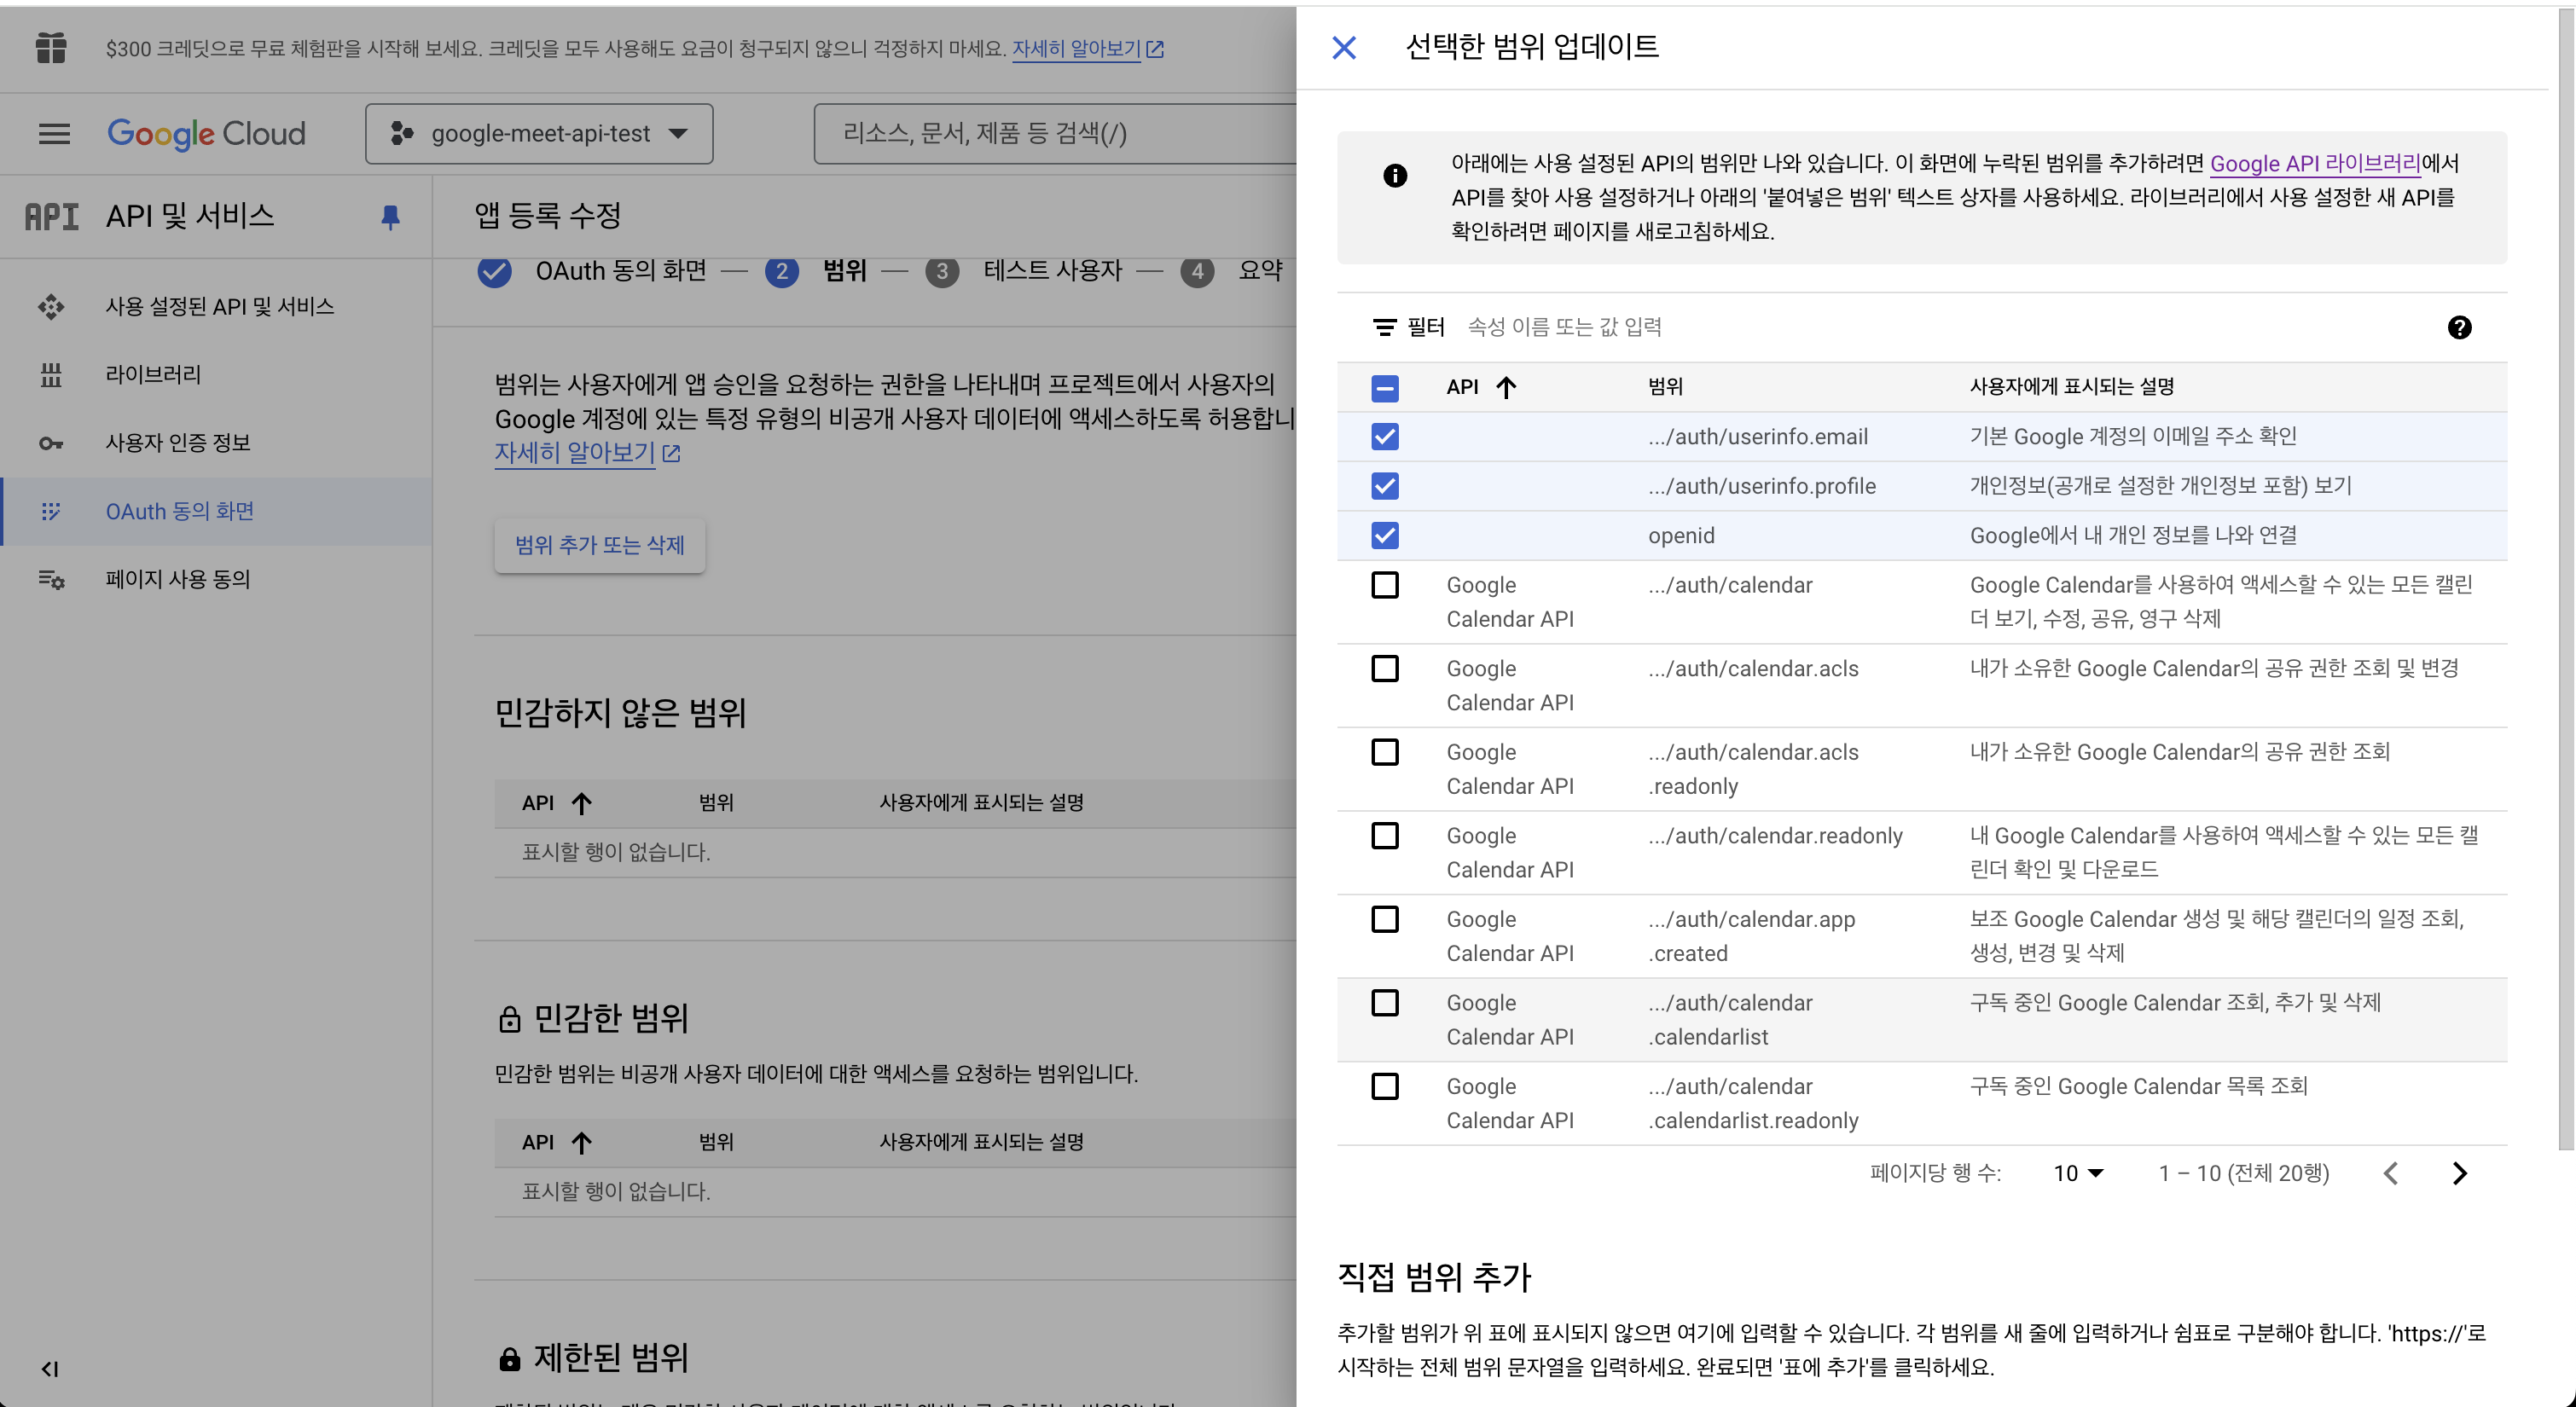
- 범위 화면에서 범위 추가 또는 삭제 버튼을 누른 뒤 등록할 구글 서비스에서 사용할 범위를 선택한다.
(기본 범위인 email, profile, openid 선택)
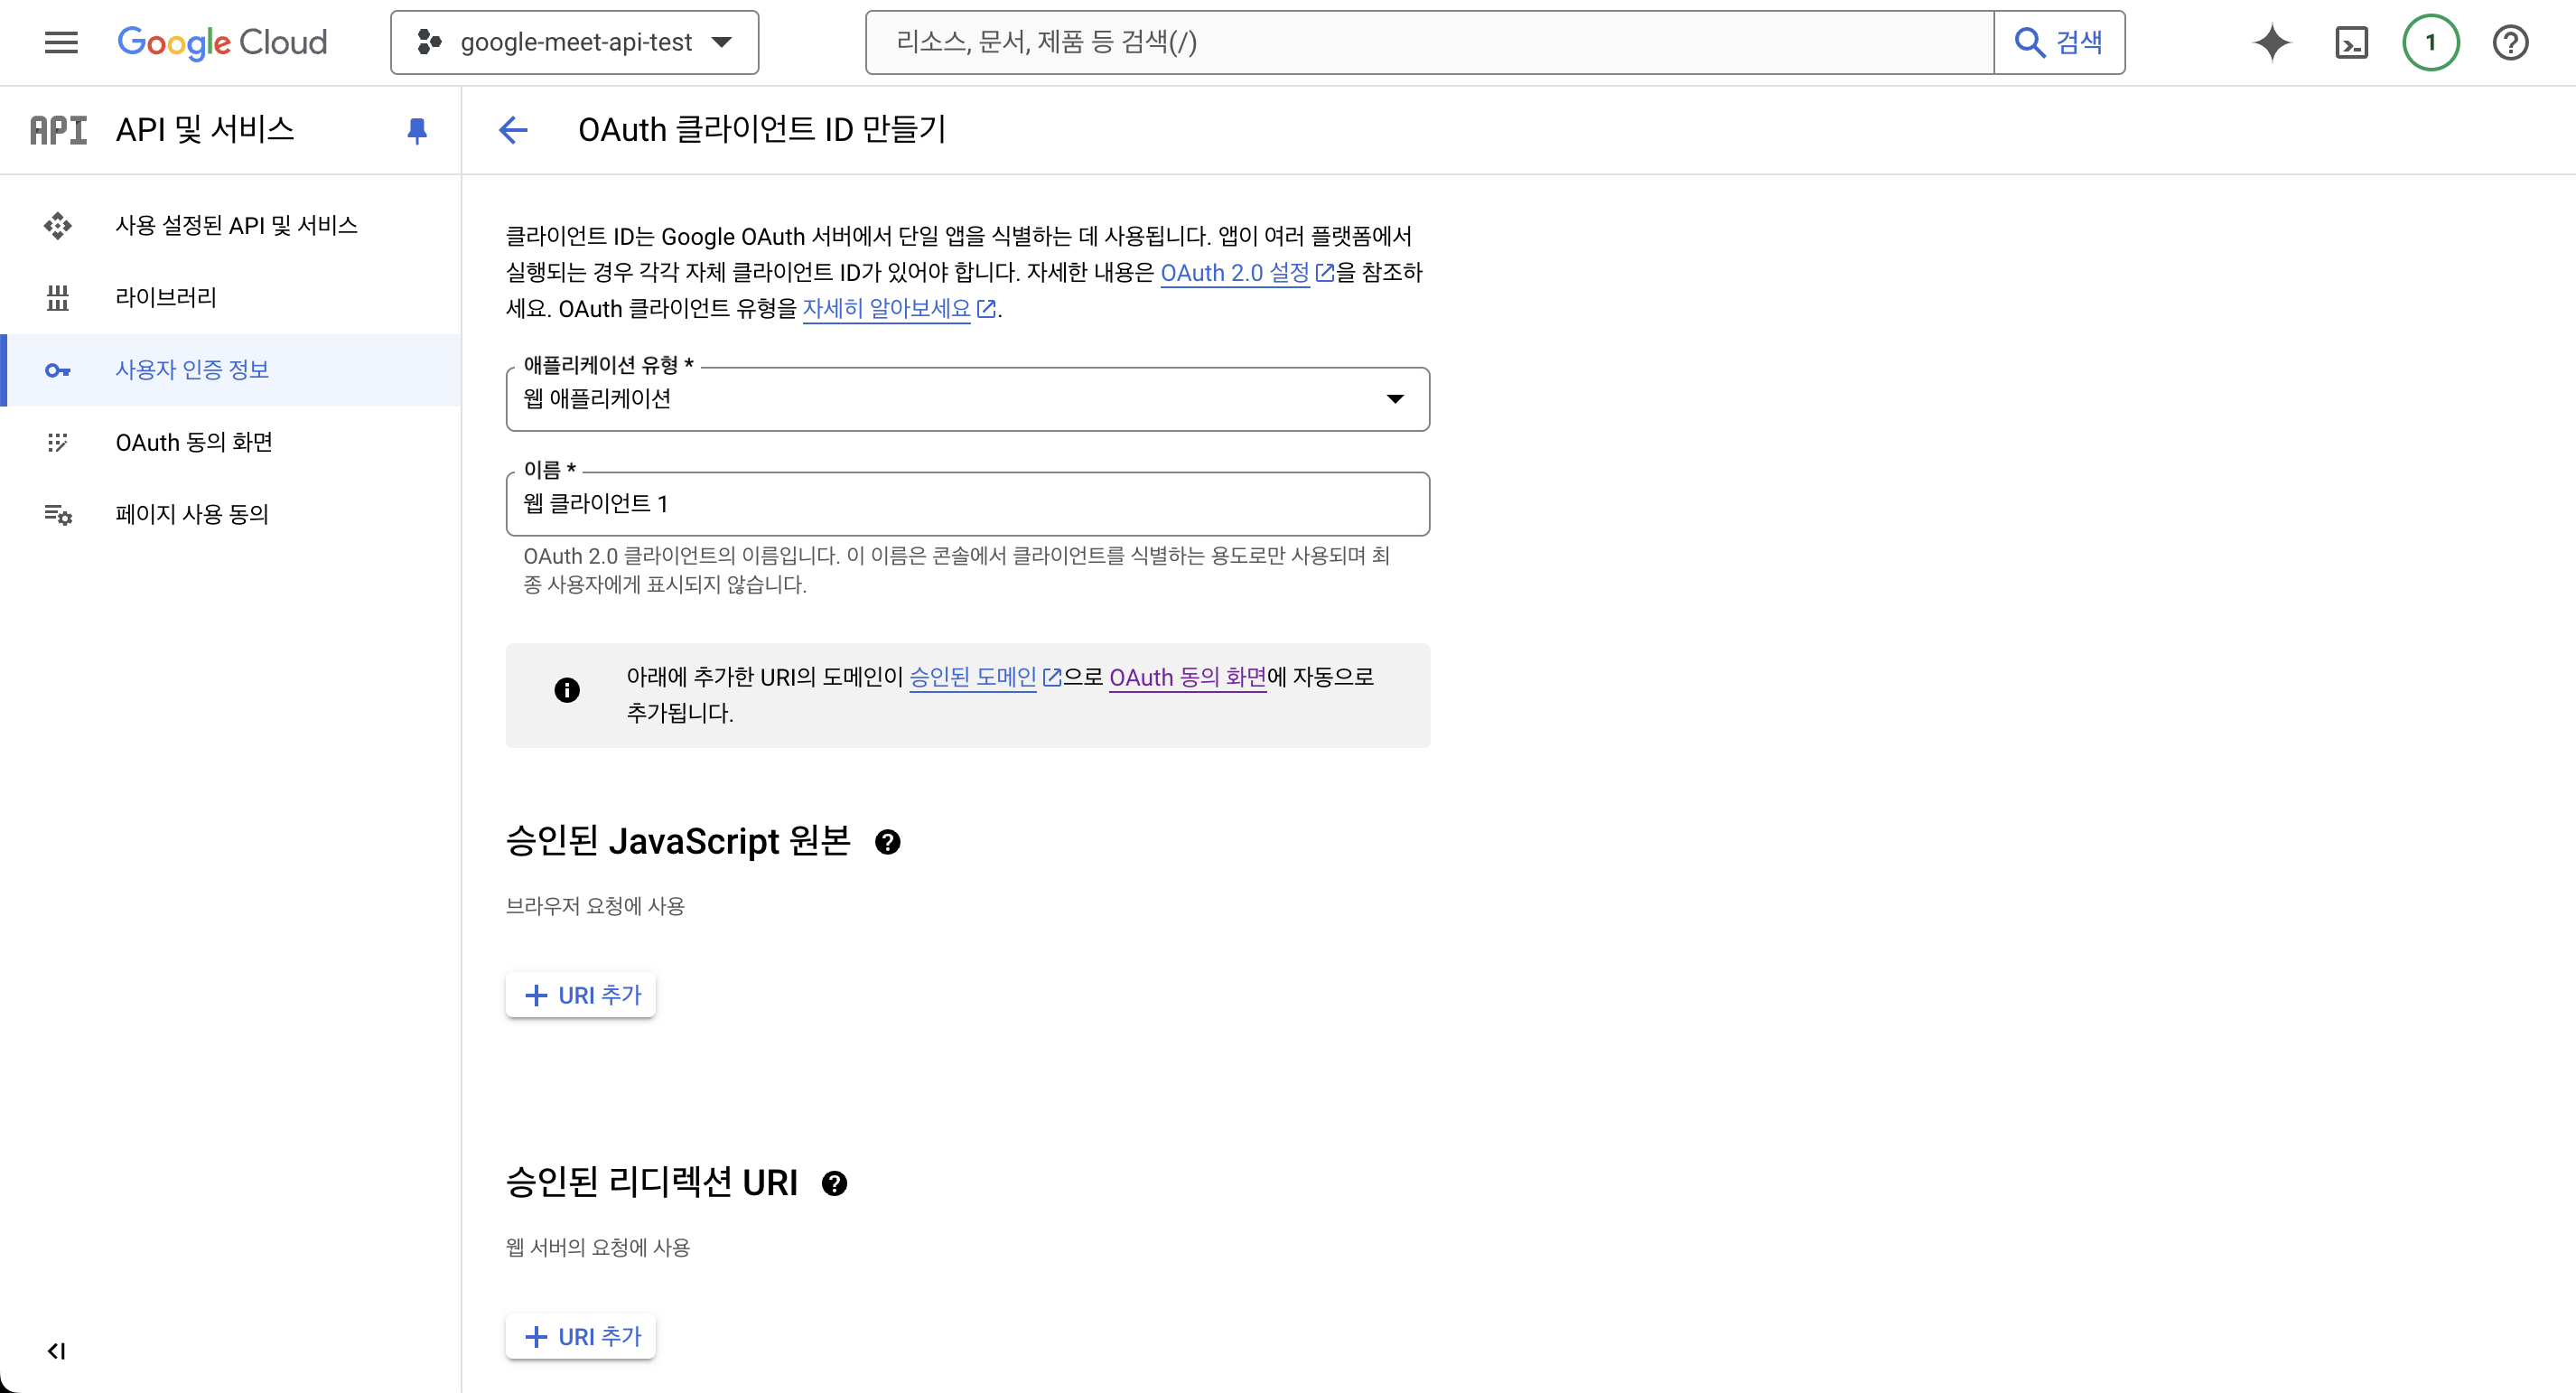
- 이렇게 동의 화면을 생성했다면, 이제 사용자 인증 정보 -> 사용자 인증 정보 만들기 -> OAuth 클라이언트 ID 를 통해 생성해준다.
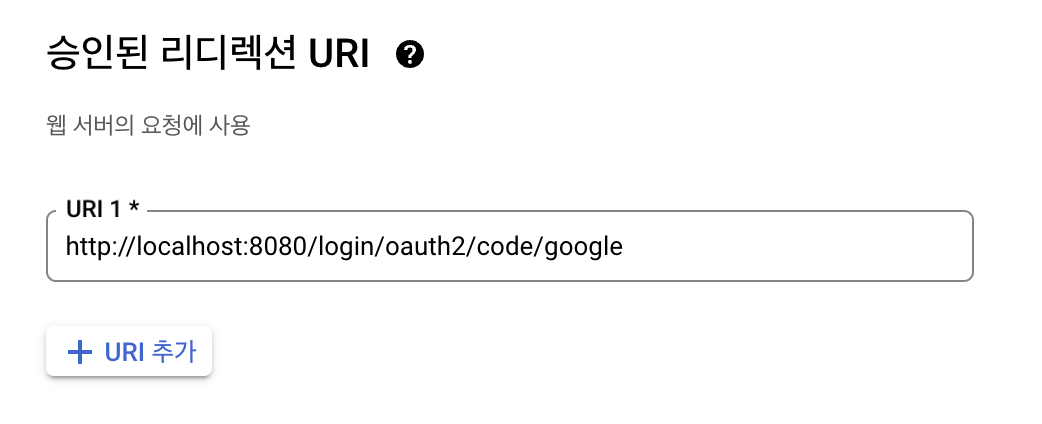
- 스프링 시큐리티에서는 기본적으로{도메인}/login/oauth2/code/{소셜서비스코드}로 Redirect URL을 지원한다.
따라서 사용자가 리다이렉트 URL에 대한 컨트롤러를 생성해줄 필요가 없다.
이후 생성해주면 클라이언트 인증 정보를 볼 수 있다.
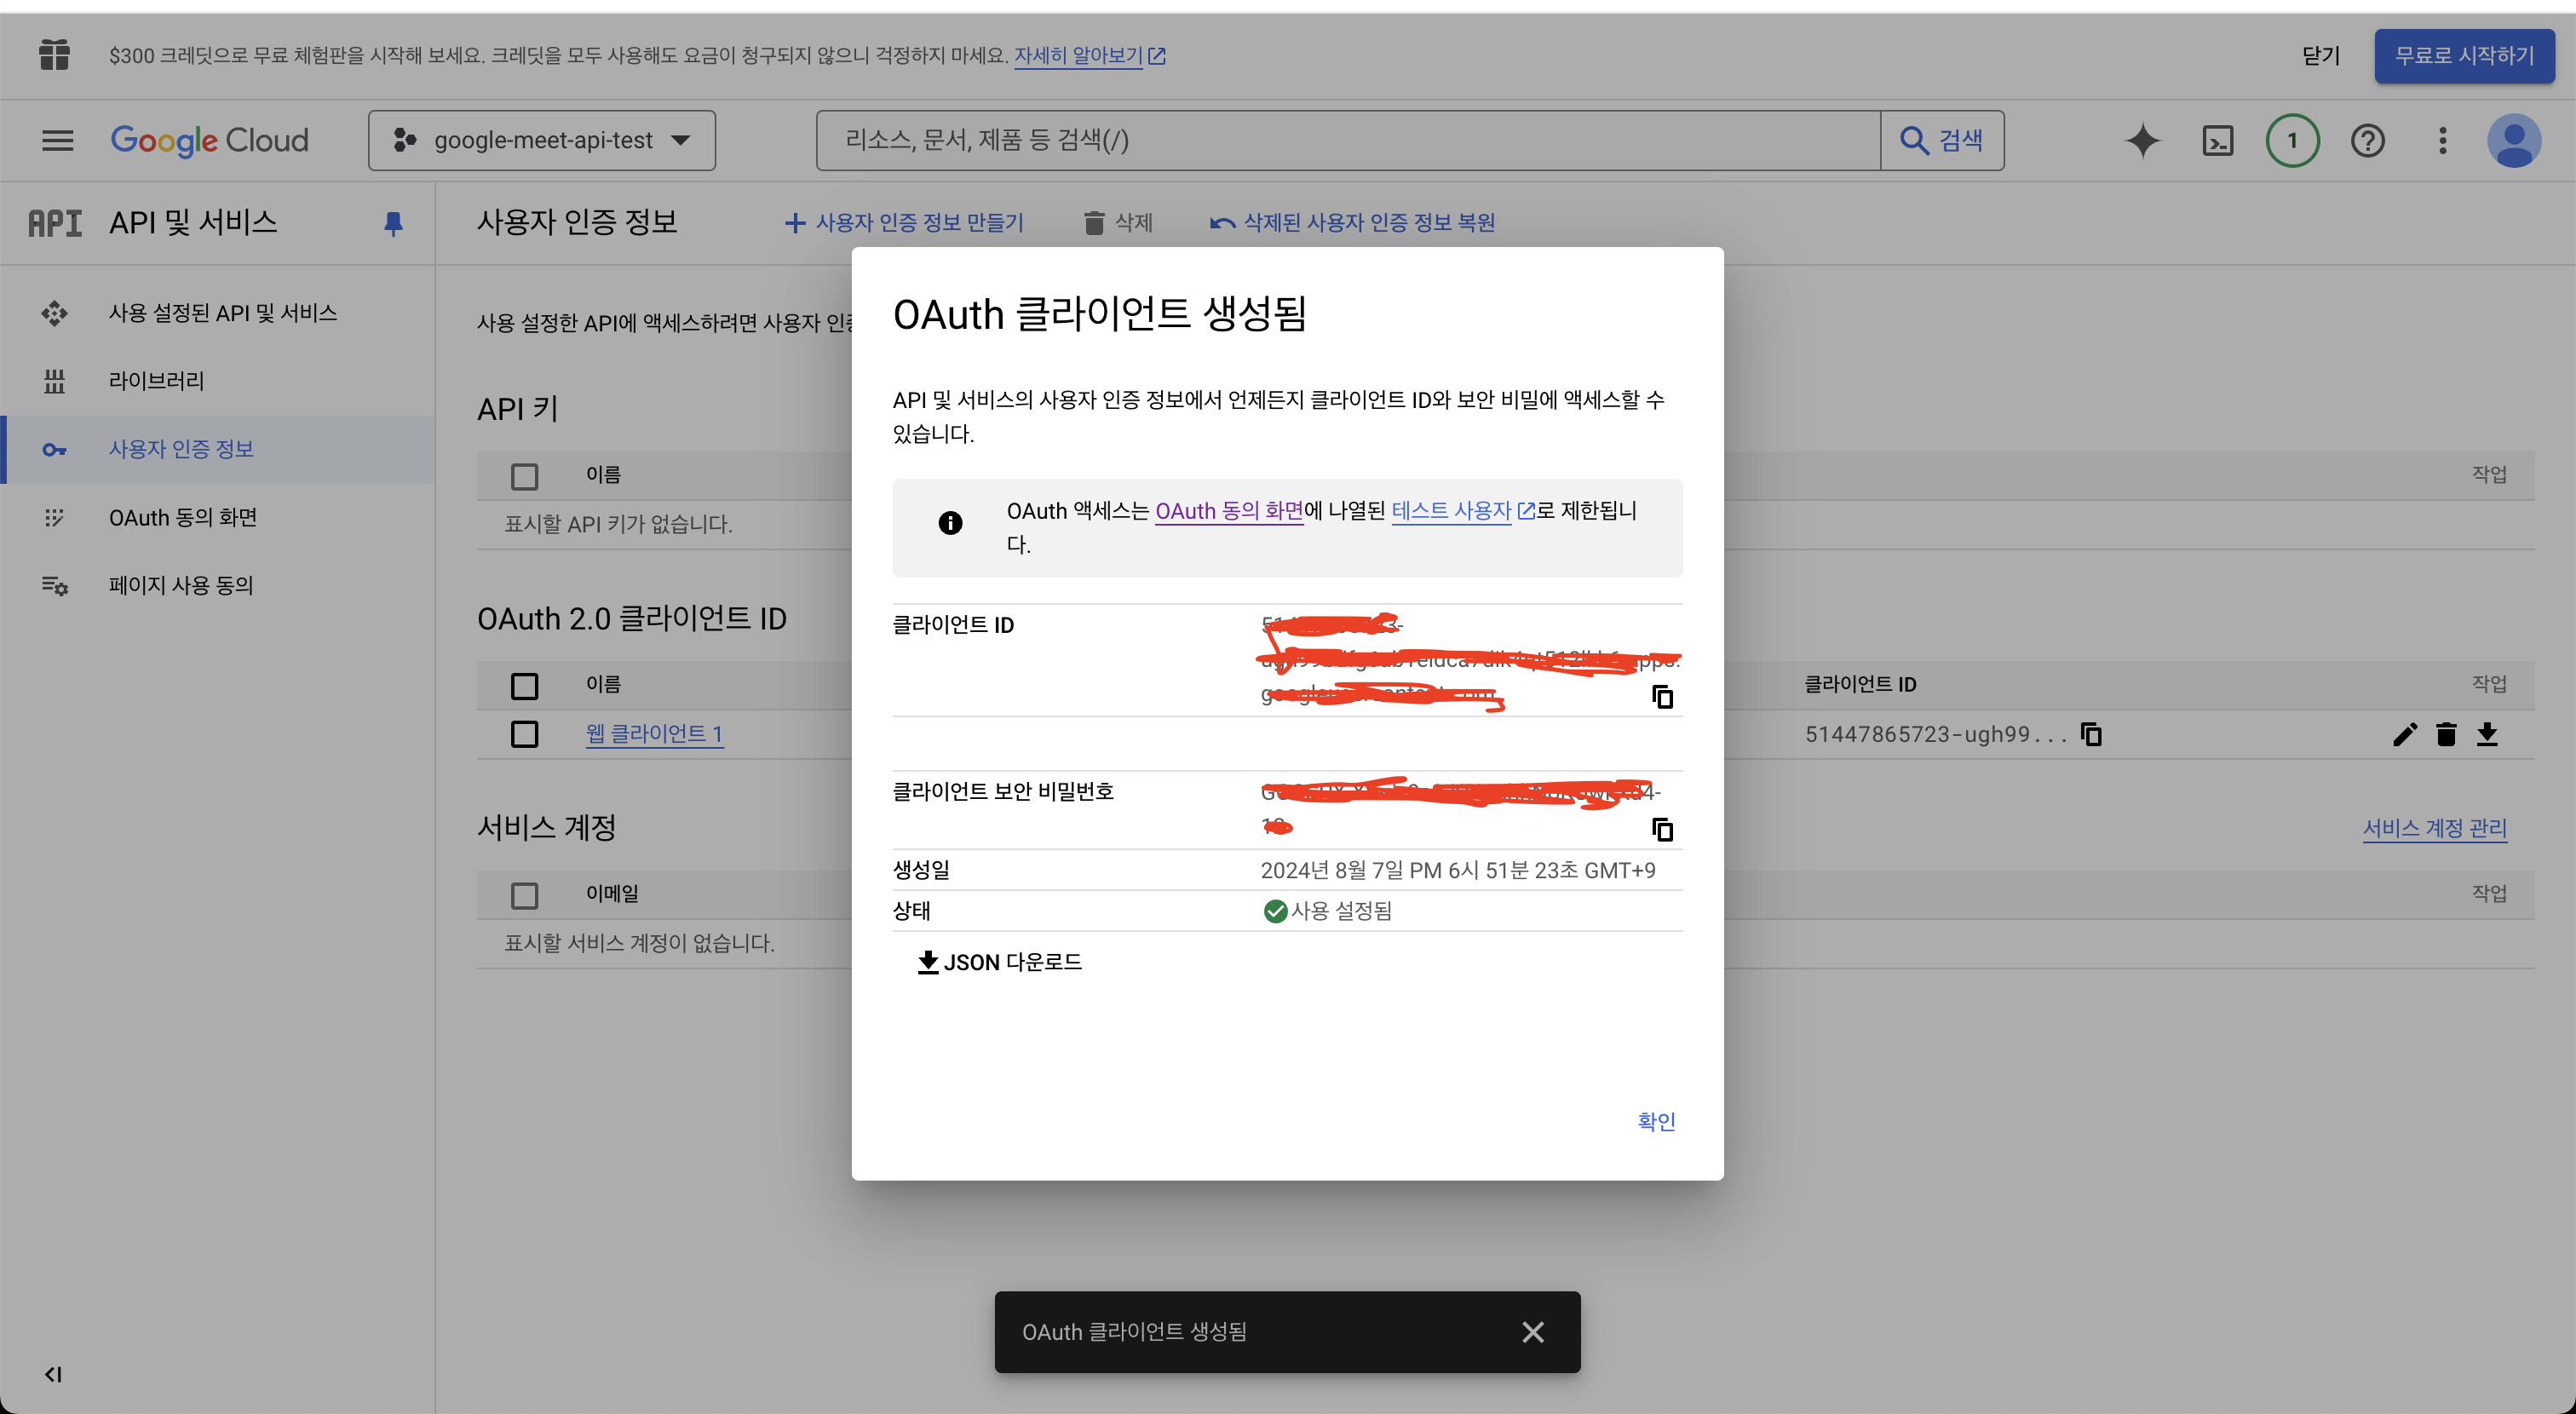
이렇게 만들어둔 Redirect URI, 생성된 Client ID, Client Secret을 Spring boot에 적용해야 한다.
2. Spring Boot 설정
- build.gradle 설정
implementation 'org.springframework.boot:spring-boot-starter-web'
implementation 'com.google.api-client:google-api-client:2.0.0'
implementation 'com.google.oauth-client:google-oauth-client-jetty:1.34.1'
implementation 'com.google.apis:google-api-services-calendar:v3-rev20220715-2.0.0'
google calendar api를 사용하기 위한 라이브러리와, oauth를 사용하기 위한 라이브러리를 추가한다.
- application.properties 설정
필자는 yaml 확장자로 변경하여 작성했다.
- application.yml
spring:
  profiles:
include: oauth- application-oauth.yml
spring:
  security:
    oauth2:
      client:
        registration:
          google:
            client-id: [client-id]
            client-secret: [client-secret-key]
            scope:
              - email
              - profile
- Google OAuth 2.0 설정 및 서비스 작성
OAuth 2.0 인증을 처리하고, Google Meet 회의 생성을 위한 Google Calendar API를 사용하는 코드를 작성합니다.
package test.googlemeetapi.googlemeet;

import com.google.api.client.auth.oauth2.BearerToken;
import com.google.api.client.auth.oauth2.Credential;
import com.google.api.client.googleapis.auth.oauth2.*;
import com.google.api.client.googleapis.javanet.GoogleNetHttpTransport;
import com.google.api.client.http.javanet.NetHttpTransport;
import com.google.api.client.json.JsonFactory;
import com.google.api.client.json.gson.GsonFactory;
import com.google.api.client.util.DateTime;
import com.google.api.services.calendar.Calendar;
import com.google.api.services.calendar.model.*;
import org.springframework.beans.factory.annotation.Value;
import org.springframework.stereotype.Service;
import test.googlemeetapi.googlemeet.GoogleCalendarService;

import java.io.InputStream;
import java.io.InputStreamReader;
import java.util.Arrays;
import java.util.Collections;
import java.util.Objects;

@Service
public class DistributeService {

    // 애플리케이션에서 사용하는 Google 클라이언트 ID를 주입받음
    @Value("${spring.security.oauth2.client.registration.google.client-id}")
    private String clientId;

    // 애플리케이션에서 사용하는 Google 클라이언트 시크릿을 주입받음
    @Value("${spring.security.oauth2.client.registration.google.client-secret}")
    private String clientSecret;

    // 애플리케이션 이름 설정
    private static final String APPLICATION_NAME = "Google Calendar API Java Quickstart";

    // JSON 처리에 사용할 JsonFactory 설정 (Gson 사용)
    private static final JsonFactory JSON_FACTORY = GsonFactory.getDefaultInstance();

    // OAuth 클라이언트 파일 경로
    private static final String CREDENTIALS_FILE_PATH = "/credentials.json";

    /**
     * Google OAuth 인증 URL을 생성하는 메서드
     * 사용자에게 인증 URL을 제공하여 Google 계정으로 로그인하고 권한을 부여받음
     * @return Google OAuth 인증 URL
     * @throws Exception 예외 처리
     */
    public String getAuthorizationUrl() throws Exception {
        // credentials.json 파일을 로드하여 Google 클라이언트 비밀 정보를 얻음
        InputStream in = GoogleCalendarService.class.getResourceAsStream(CREDENTIALS_FILE_PATH);
        GoogleClientSecrets clientSecrets = GoogleClientSecrets.load(JSON_FACTORY, new InputStreamReader(Objects.requireNonNull(in)));

        // GoogleAuthorizationCodeFlow를 사용하여 OAuth 인증 흐름을 설정
        GoogleAuthorizationCodeFlow flow = new GoogleAuthorizationCodeFlow.Builder(
                GoogleNetHttpTransport.newTrustedTransport(), JSON_FACTORY, clientSecrets, Collections.singletonList("https://www.googleapis.com/auth/calendar"))
                .setAccessType("offline") // 오프라인 접근 권한 설정
                .build();

        // 사용자가 Google 계정으로 인증할 수 있는 URL 생성 및 반환
        return flow.newAuthorizationUrl().setRedirectUri("http://localhost:8888/Callback").build();
    }

    /**
     * OAuth 2.0 인증 코드를 사용하여 Google Meet 이벤트를 생성하는 메서드
     * @param code OAuth 2.0 인증 코드
     * @param summary 이벤트 제목
     * @param description 이벤트 설명
     * @param location 이벤트 위치
     * @param startDateTime 이벤트 시작 시간
     * @param endDateTime 이벤트 종료 시간
     * @param attendeesEmails 참석자 이메일 목록
     * @return 생성된 Google Meet URL
     * @throws Exception 예외 처리
     */
    public String createEventWithCode(String code, String summary, String description, String location, String startDateTime, String endDateTime, String[] attendeesEmails) throws Exception {
        // 인증 코드를 사용하여 액세스 토큰을 얻음
        GoogleTokenResponse tokenResponse = new GoogleAuthorizationCodeTokenRequest(
                new NetHttpTransport(),
                GsonFactory.getDefaultInstance(),
                "https://oauth2.googleapis.com/token",
                clientId,  // Google API Console에서 얻은 클라이언트 ID
                clientSecret,  // Google API Console에서 얻은 클라이언트 시크릿
                code,
                "http://localhost:8888/Callback")  // 리디렉션 URI
                .execute();

        // BearerToken을 사용하여 Credential 객체를 생성하고 액세스 토큰을 설정
        Credential credential = new Credential(BearerToken.authorizationHeaderAccessMethod()).setAccessToken(tokenResponse.getAccessToken());

        // Google Calendar API 서비스 객체를 생성
        Calendar service = new Calendar.Builder(GoogleNetHttpTransport.newTrustedTransport(), JSON_FACTORY, credential)
                .setApplicationName(APPLICATION_NAME)
                .build();

        // 이벤트 객체 생성 및 기본 정보 설정
        Event event = new Event()
                .setSummary(summary) // 이벤트 제목 설정
                .setLocation(location) // 이벤트 위치 설정
                .setDescription(description); // 이벤트 설명 설정

        // 이벤트 시작 시간 설정 (KST 타임존 사용)
        EventDateTime start = new EventDateTime()
                .setDateTime(new DateTime(startDateTime)) // 시작 날짜 및 시간 설정
                .setTimeZone("Asia/Seoul");  // 한국 표준시(KST) 설정
        event.setStart(start);

        // 이벤트 종료 시간 설정 (KST 타임존 사용)
        EventDateTime end = new EventDateTime()
                .setDateTime(new DateTime(endDateTime)) // 종료 날짜 및 시간 설정
                .setTimeZone("Asia/Seoul"); // 한국 표준시(KST) 설정
        event.setEnd(end);

        // 참석자 목록 생성 및 설정
        EventAttendee[] attendees = new EventAttendee[attendeesEmails.length];
        for (int i = 0; i < attendeesEmails.length; i++) {
            attendees[i] = new EventAttendee().setEmail(attendeesEmails[i]); // 각 참석자의 이메일 설정
        }
        event.setAttendees(Arrays.asList(attendees));

        // Google Meet 회의 데이터를 설정
        ConferenceData conferenceData = new ConferenceData();
        ConferenceSolutionKey conferenceSolutionKey = new ConferenceSolutionKey();
        conferenceSolutionKey.setType("hangoutsMeet"); // Google Meet 회의 타입 설정
        CreateConferenceRequest createConferenceRequest = new CreateConferenceRequest();
        createConferenceRequest.setRequestId("some-random-string"); // 유니크한 요청 ID 설정
        createConferenceRequest.setConferenceSolutionKey(conferenceSolutionKey); // 회의 솔루션 키 설정
        conferenceData.setCreateRequest(createConferenceRequest); // 회의 데이터에 요청 설정
        event.setConferenceData(conferenceData); // 이벤트에 회의 데이터 설정

        // Google Calendar API를 통해 이벤트를 삽입하고 생성된 이벤트를 반환
        Event createdEvent = service.events().insert("primary", event)
                .setConferenceDataVersion(1) // 회의 데이터 버전 설정
                .execute(); // 이벤트 생성 요청 실행

        // Google Meet URL을 추출
        ConferenceData createdConferenceData = createdEvent.getConferenceData();
        String googleMeetLink = null;
        if (createdConferenceData != null && createdConferenceData.getEntryPoints() != null) {
            for (EntryPoint entryPoint : createdConferenceData.getEntryPoints()) {
                if ("video".equals(entryPoint.getEntryPointType())) {  // Google Meet 링크인지 확인
                    googleMeetLink = entryPoint.getUri();  // Google Meet URL 추출
                    break;
                }
            }
        }

        // Google Meet URL 반환 (없을 경우 기본 메시지 반환)
        return googleMeetLink != null ? googleMeetLink : "No Google Meet link available";
    }
}
1. getAuthorizeURL()
해당 사용자의 구글 Oauth2 인증을 받기 위한 URL을 발급한다.
사용자는 해당 URL에 접속하게 되면, 쿼리 파라미터로 code를 발급받게 된다.
2. createEventWithCode()
위 메서드에서 발급된 code를 파라미터에 담아 실행하면, Google Calendar Event를 생성한다. Hangout 타입으로 생성하게 되면 Google Meet가 생성되는데 해당 화상 회의의 공유 URL을 리턴해주는 로직을 작성했다.
참고
https://developers.google.com/calendar/api/quickstart/java?hl=ko
자바 빠른 시작 | Google Calendar | Google for Developers
이 페이지는 Cloud Translation API를 통해 번역되었습니다. 의견 보내기 자바 빠른 시작 컬렉션을 사용해 정리하기 내 환경설정을 기준으로 콘텐츠를 저장하고 분류하세요. 빠른 시작에서는 Google Work
developers.google.com
'Back-end > Spring' 카테고리의 다른 글
| [Spring] self-hosted Runner를 통한 CI/CD 배포 (0) | 2024.11.21 |
|---|---|
| [Spring] @RequestPart vs @RequestParam vs @RequestBody (1) | 2024.10.11 |
| [Spring] JWT + Redis를 활용한 로그아웃 구현 (Jwt BlackList) (3) | 2024.10.06 |
| [Spring] Query Parameter vs Path Variable (2) | 2024.10.02 |
| [Spring] Security + JWT + Redis를 활용한 로그인 구현 (2) (0) | 2024.08.30 |